[그래프 그리는 사이트]K-means Clustering
Column 1 of the example data contains the name of each person. Starting from column 2, the rest have scores (numeric variables).
예제 데이터의 1열에는 각 사람의 이름이 있습니다. 2열부터 나머지에는 점수(숫자 변수)가 있습니다.
All numbers should be standardized.
This is because the units and ranges of each number are different.
숫자들은 모두 표준화를 해야 합니다. 각 숫자들의 단위와 범위가 다르기 때문입니다.
This is a plot to help determine how many clusters it is appropriate to divide into.
It shows that 3 clusters are suitable.
몇 개의 cluster로 나누는 것이 적당한지 도움을 주는 plot입니다.
3개의 cluster가 적당하다고 보여줍니다.
Select the second option, wss. It's like showing a cross section of a mountain. Where is the part that changes from the mountain to the slope, that is, the flat part?
This picture is really vague, but the part where the steep slope becomes gentle is a little vague from 2 to 4.
So, the number of clusters seems to be from 2 to 4.
두번째 옵션인 wss를 선택해 줍니다. 마치 산의 단면을 보여주는 것같은데 산에서 비탈로 바뀌는 부분 즉 평지 부분이 어디일까요?
이 그림은 진짜 애매한데 급격한 경사가 완만해 지는 부분이 2부터 4까지 조금 애매합니다.
그래서 cluster의 갯수는 2부터 4까지 가능할 것같습니다.
Now change the option to 'silhouette' and you will see a different picture.
This figure shows that the number of clusters is appropriate.
It is not very clear whether it is appropriate to divide into several clusters like this,
and the subjectivity of the researcher may be involved.
이제 옵션을 'silhouette'으로 바꾸니 다른 그림이 보여집니다.
이 그림에서는 cluster의 갯수가 2가 적당하다고 보여 줍니다.
이처럼 몇 개의 cluster로 나누는 것이 적당한지는 아주 명확하지 않고
연구자의 주관이 개입될 여지가 있습니다.
Now, change the 'Select plot' from 'Optimal number' to 'k means tree(I)'.
And the current 'number of groups' is 3.
이제 'Select plot 을 'Optimal number'에서 'k means tree(I)'로 바꾸어 줍니다.
그리고, 현재의 'number of groups'은 3입니다.
The resulting picture is like an upside-down tree branch.
I think it's more of a root than a branch of a tree,
but people usually use the word 'dendro-' to mean a branch.
When the branch splits and then splits into three, a square is formed.
결과적으로 만들어진 그림은 나뭇가지를 거꾸로 그려진 것같은 그림입니다.
제 생각에는 나무의 가지보다는 뿌리에 가깝지만,
사람들은 보통 나뭇가지를 의미하는 'dendro-'라는 말을 씁니다.
가지가 갈라지다가 3개로 갈라질 때의 묶음으로 사각형이 형성되어 있습니다.
If you change 'number of groups' to 2, the box will be changed to 2.
Let's imagine. There is a horizontal line, so it descends slowly and at a constant speed from top to bottom. Assuming the horizon cuts this branch,
there will still be two boxes while the horizon descends for a long time.
Then, when the height is about 10-13, there will be 3 boxes,
and when the height is 5-10, there will be 4 boxes.
Where is the high range of this horizontal line?
For quite some time there are 2 boxes, then 3 short, then 4 slightly longer.
'number of groups'을 2ㄹ 바꾸어 주면 상자가 2개로 바뀝니다.
상상해 봅시다. 수평선이 있어서 위에서부터 아래로 천천히 일정한 속도로 내려옵니다.
수평선이 이 가지를 자른다고 가정할 때,
수평선이 오랜 시간 내려오는 동안 계속 상자는 2개일 것입니다.
그러다가 높이가 10-13정도일 때는 상자가 3개이다가
높이가 5-10일 때는 상자가 4가 될 것입니다.
이 수평선의 높이의 범위가 높은 부분은 어디인가요?
꽤 오랜 동안 상자가 2개이다가 짧게 3개이다가 다시 약간 길게 4개입니다.
If you select 'kmeans tree(II)', the parameter color will change not only for the box but also for the tree.
'kmeans tree(II)'를 선택한다면, 상자뿐 아니라 나무까지 모수 색이 달라지게 됩니다.
'cluster plot' calculates the distances of relative points and displays them on the coordinate plane.
Now let's group these points into groups.
They are also shown by grouping them by color.
'cluster plot'은 상대적인 점들의 거리를 계산해서 좌표평면에 보여 줍니다. 이제 이 점들을 몇 개의 집단으로 묶어 봅니다. 색으로 집단별로 구분해서 보여주기도 합니다.
Now, after selecting 'heatmap', let's adjust the number of 'number of groups
and 'number of factor'.
The created heatmap seems to have little difference, but if you move the numbers,
you can see that the spacing of the tiles varies according to the numbers.
There is a difference between tying horizontally and vertically.
Let's think of this data as student grades.
There is a way to group similar students together and classify similar subjects.
Horizontal and vertical mean it.
이제 'heatmap 을 선택한 뒤에
'number of groups 과 'number of factor'의 숫자를 조절해 봅시다.
만들어진 heatmap이 거의 차이가 없는 것같지만,
숫자를 움직여 보면 숫자에 따라 tile들의 간격이 달라지는 것을 알 수 있습니다.
가로방향과 세로 방향으로 묶어지는 것이 다릅니다.
이 data가 학생들의 성적이라고 생각해 봅시다.
비슷한 학생들끼리 묶어서 분류하는 방식이 있고,
비슷한 과목들을 분류하기도 할 것입니다. 가로와 세로가 그것을 의미합니다.
Now let's look at the various mathematical options
to calculate this distance and which points to group together.
Experiment with how the picture changes by changing these options.
이제 이 거리를 계산하고 어떤 점들을 하나로 묶을 것인지 계산하는
수학적인 다양한 옵션들을 만나보겠습니다.
이옵션들을 바꾸어 보면서 그림이 어떻게 바뀌는지 직접 실험해 보세요.
'plot download'를 통해서 plot size를 조절하세요.
< PDF >, < SVG > < pptx >를 클릭하면 각각의 형식으로 다운로드 받을 수 있습니다.
Adjust the plot size through 'plot download'.
You can download each format by clicking < PDF >, < SVG > < pptx >.
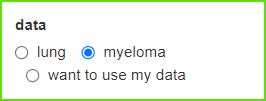
당신의 데이터를 업로드 하려면 'want to use'를 활성화한 다음, 'Browse'를 클릭하세요.
오직 csv 파일만이 사용가능합니다.
Activate 'want to use' to upload your data, then click 'Browse'.
Only csv file is available.